This article is by Lucy Heiderscheit, a writer for Optics Empire with a ton of knowledge on optics.
In this article, I’ll explain how to digiscope with a monocular in eight short, easy to digest steps.
First, let’s start with some background info.
What is Digiscoping?
To put it in simple terms, digiscoping is when you couple an optic scope with a digital camera and record images from a distance.
This activity is very commonly performed in bird watching, wildlife viewing, hunting, and many other outdoor activities.
Digiscoping is a type of afocal photography (Cicco, 2019) that has been used in the astronomical community for years with telescopes. Afocal photography is any photography method that replaces the human eye with a camera. Click on the “afocal photography” link above for more information about how it is used in the astronomy community.
Originally, digiscoping was only done with telescopes, but bird watchers adapted it and it quickly was applied to spotting scopes and monoculars as well.
Can You Digiscope With Your Monocular?
Yes, you can…
And the step-by-step directions in this article will show you how to do just that.
There are also links attached to help you find equipment that is needed for digiscoping, if you do not already own the needed equipment.
Without further ado, here are the steps to digiscoping with a monocular
Step 1: Find a camera that will work for digiscoping.
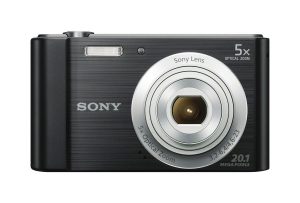
A compact camera is most desirable for digiscoping.
You also want a camera that’s durable, because digiscoping can get rough at times.
Use a camera with about 3 to 5 times optical zoom.
If you have a camera with these features already, that’s great! It’ll work perfectly.
If you don’t have a camera like that, this link to Amazon will direct you to one of the best cameras for digiscoping on the market.
Note: If you want to read about digiscoping with a phone, scroll down!
Step 2: Find a monocular that will work for digiscoping.
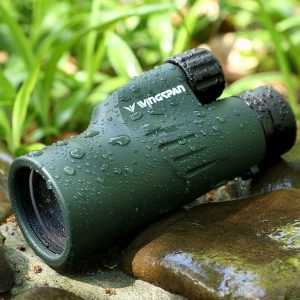
The best digiscoping monoculars have large objective lenses.
The bigger the objective lens, the more light will be let in, resulting in a better picture.
Although a large objective lens is ideal, it isn’t necessary. Any good monocular will do.
You should set your monocular to a zoom setting between 10- 20x while digiscoping.
If you do not have a monocular handy already, click this link to Amazon to see our absolute favorite monocular for digiscoping.
Step 3: Find an adaptor that will work for digiscoping.
Lucky for us consumers, they make universal digiscope adaptors that can be used to connect almost any camera and monocular.
I would definitely recommend purchasing one because, without it, it will be a major struggle to get the two working in unison.
If you do not already have an adaptor, here is a list of some you can buy.
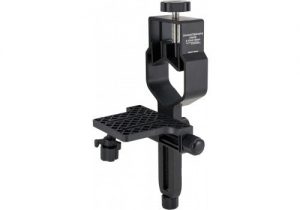
Step 4: Find a tripod you can use with your monocular.
You can use a traditional tripod head or a fluid filled alignment tripod head.
The fluid filled alignment tripod head will be more expensive, but it will also be easier to move and adjust.
The traditional tripod head uses conventional screws, which is why it is harder to move around.
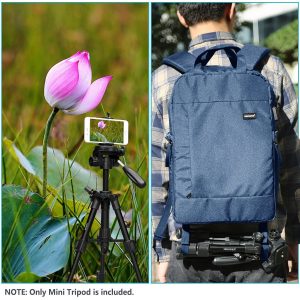
The monocular we linked to up above doesn’t come with a tripod, so you might have a little searching to do if you want to find one. Get a small one, like you see in the image above.
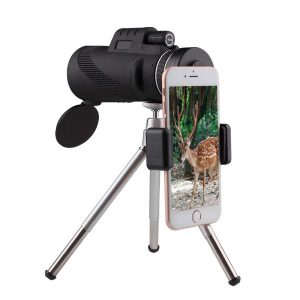
Step 5: You’re ready to start! Attach your camera to your monocular using your adaptor.
It is important to make sure in steps one through four that your equipment fits before setting up.
I advise you to set up all of your equipment before leaving home to make sure it’s all working properly.
Step 6: Set up the camera and monocular on your tripod.
Make sure it is very stable so your equipment does not falter.
Step 7: Look through the monocular to see your picture.

You can adjust your camera to get the picture you want.
Some people go for the clearest image possible. Others adjust their camera to blur everything apart from one image, or to focus clearly in the middle but blur the edges of the photo.
The possibilities are endless, but just make sure it is set up how you like it.
I have taken many pictures with digiscoping, and I’ll tell you, they’re some of the most beautiful pictures I’ve seen. Nothing beats the close-up images digiscoping can get you.
Step 8: Set your camera up on a timer and wait, or just take your photos.

Whatever you prefer is fine!
If you wait to take your pictures, make sure that you are not shaking the monocular or camera at all. You want your photo to be as accurate as possible.
Digiscoping With a Smartphone
Digiscoping, like many things, is feeling the impact of modern technology, which means smartphones have made their way on to the scene.
It’s growing in popularity and it’s probably surpassed the old camera method already.
Here’s a link to a smartphone adapter that’ll allow you to digiscope with a a smartphone rather than a camera: (See on Amazon).
If you chose to go with the smartphone method, all of the above steps still apply, but replace “camera” with “smartphone”.
Final Thoughts
Keep in mind, learning how to digiscope might take a while.
A lot of people find it challenging at first, but if you enjoy it keep working at it until you get it.
You can’t force the perfect picture, but if you take the time and practice patience you can come away with some awesome shots.

About The Author:
Hi! I’m Will Scott, the author of this post. I’m an outdoor enthusiast with over 10 years experience. I love trying out new gear and reviewing it so that other adventurers can get the most out of their experiences. I hope you’ve found my website informative, educational and helpful.